Follow this simple guide to set up TableMaster in less than 10 minutes. In just 5 steps, we’ll explain everything you need to know to get your system up and running and start receiving bookings seamlessly.
To register for TableMaster, it is essential to use the same email address linked to your NordQR account. Make sure your subscription (Lite or Pro) is active, as it will not be possible to complete the registration with a different email or without a paid plan.
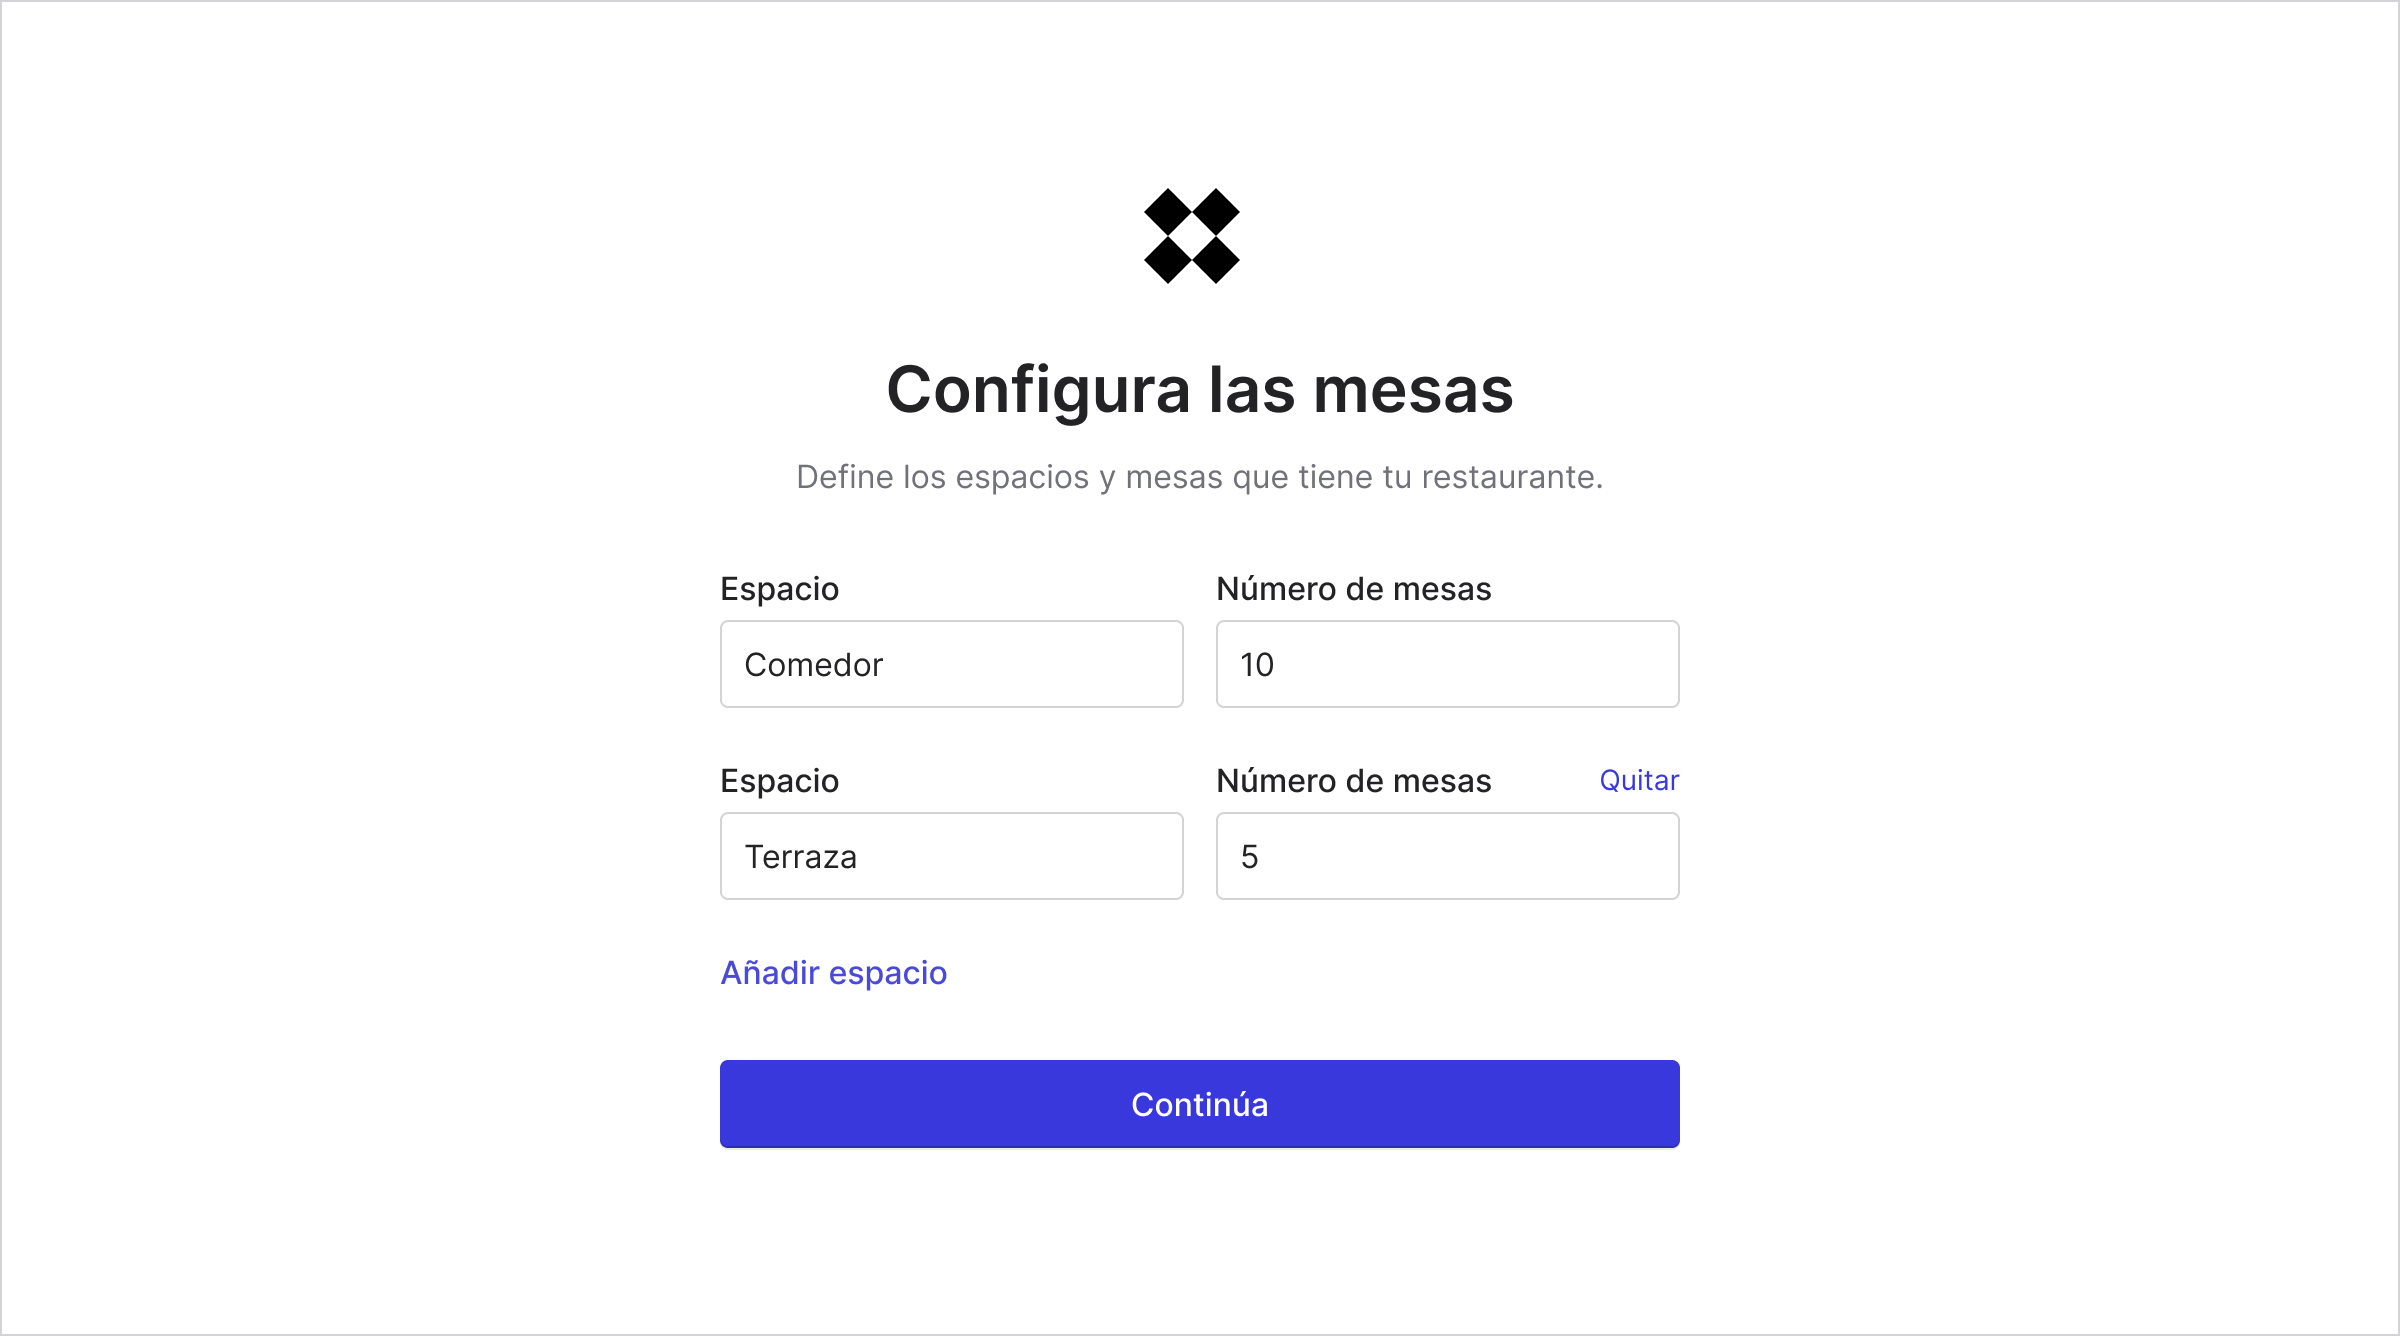
Once your account is created, it is important to configure the seating capacity for each table. To do so, follow these simple steps:
1. Go to the Settings page.
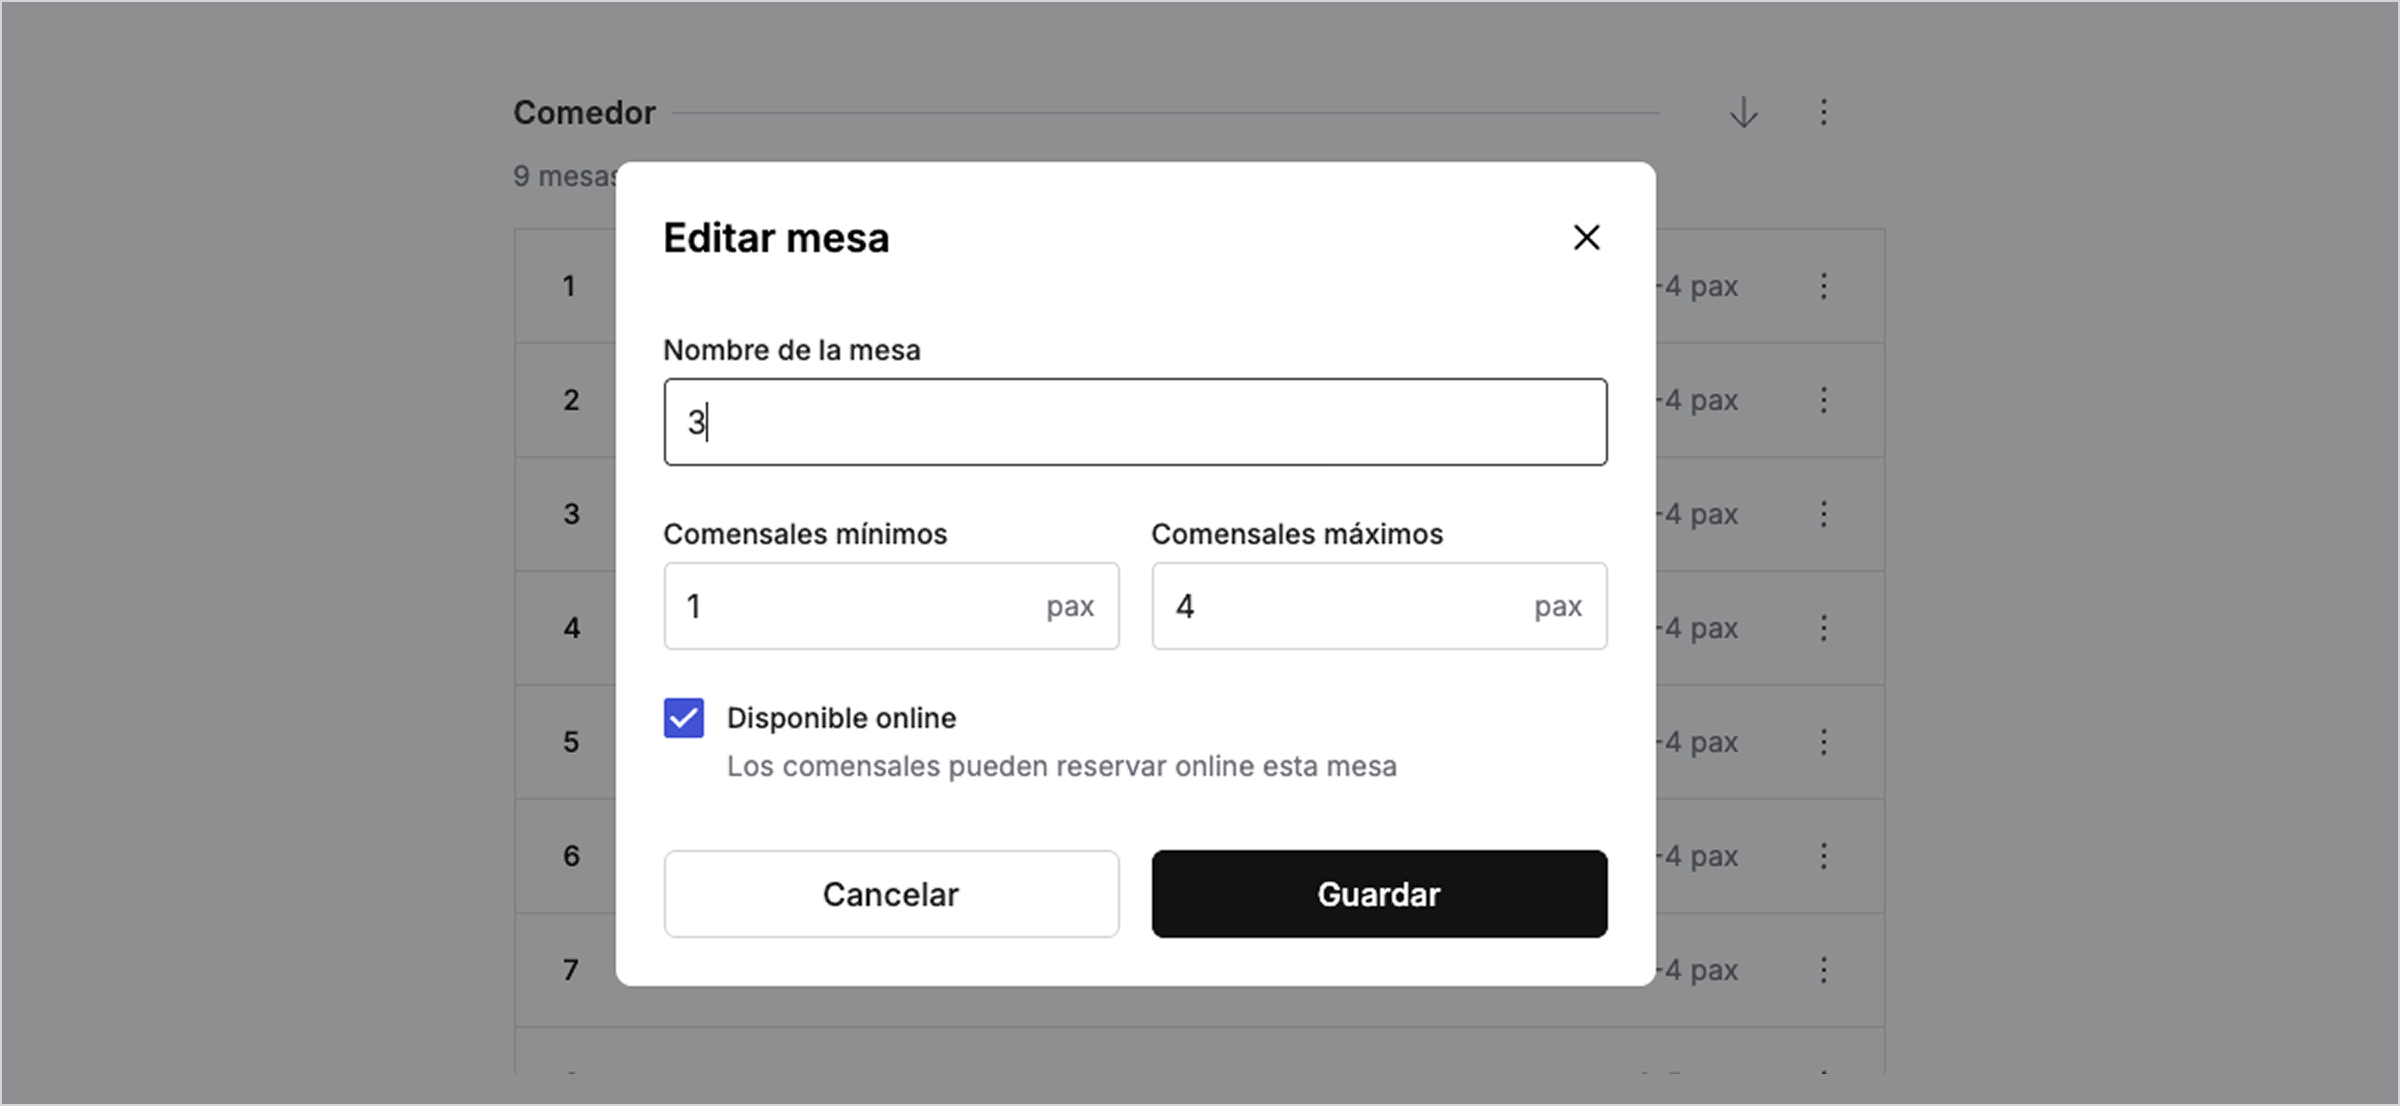
2. Click on Tables and spaces. In this section, you will see each of your restaurant's spaces and their respective tables. By default, all tables have a capacity of 4 guests.

3. Click on the table you wish to edit and then set the minimum and maximum number of guests required for reservations at this table.
From this section, you will also be able to add new spaces and tables whenever you want.
In TableMaster, you have total flexibility to create reservations at any time or day you wish. However, it is very important that you define the days and hours during which your guests can make bookings from the public page.
1. Go to the Settings page.
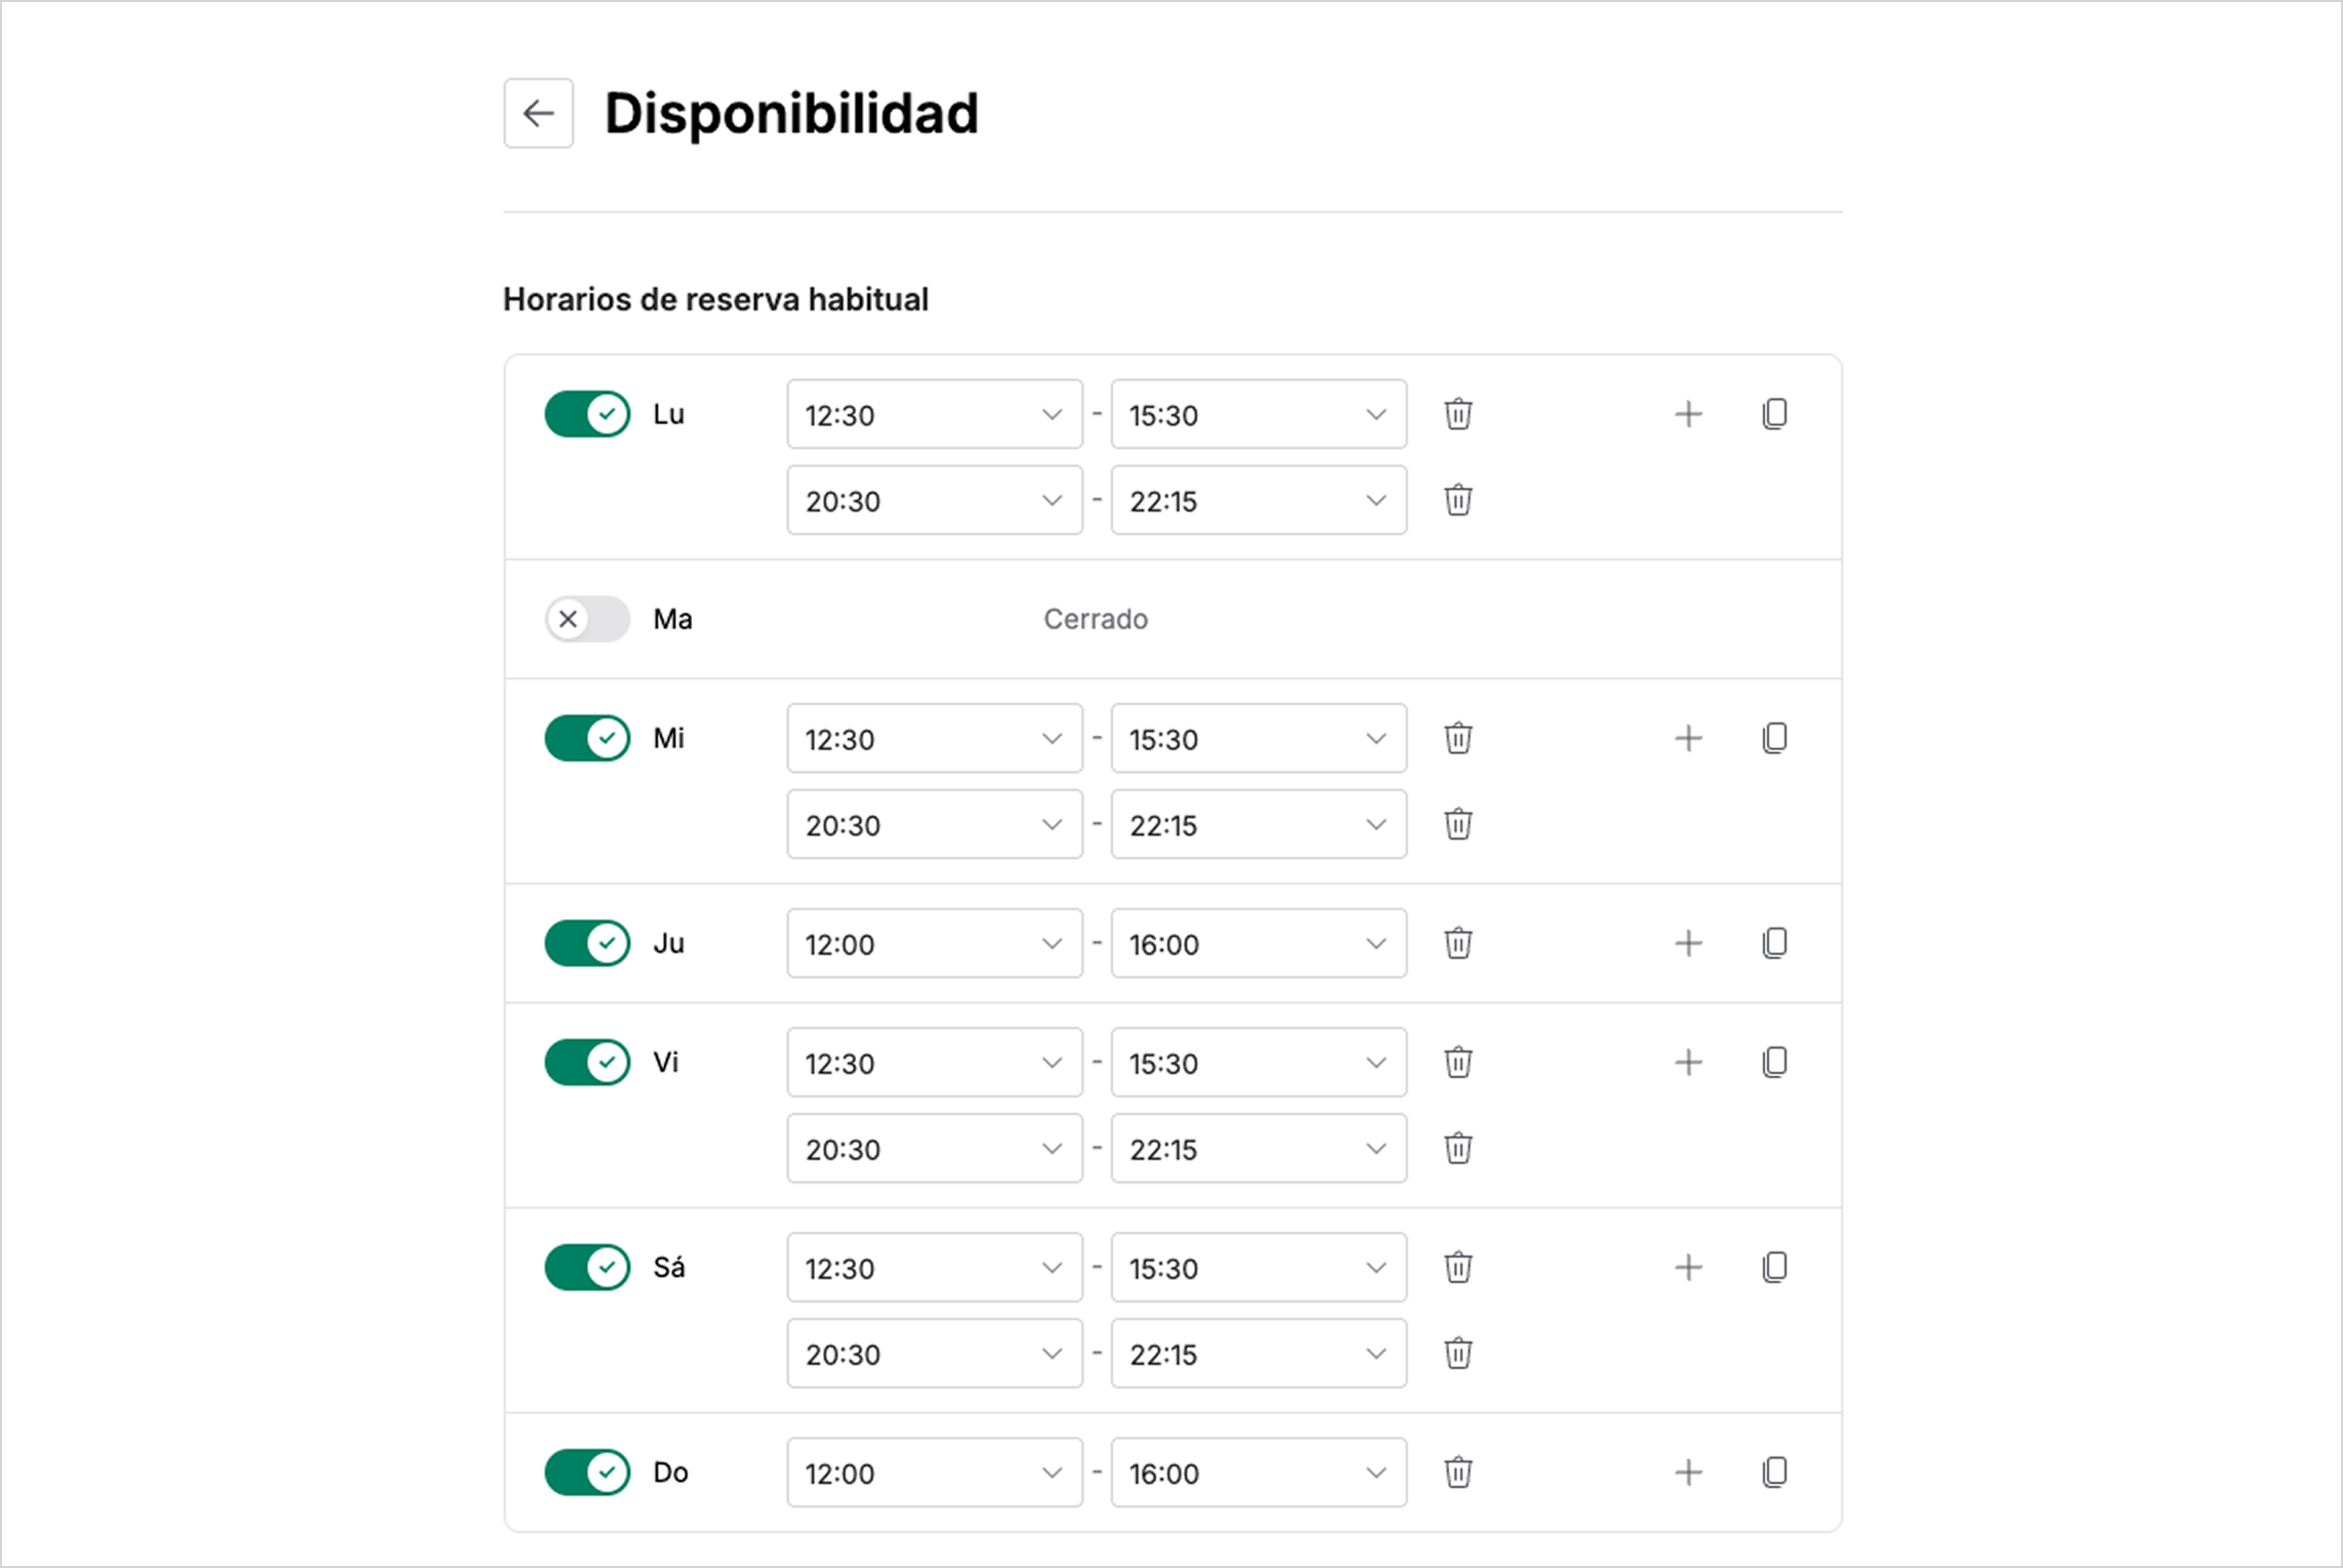
2. Click on Availability.
3. Define the days and times your restaurant is typically open. If you have several shifts (lunch and dinner), you can create multiple time slots for each day. For example, from 12:30 to 15:00 and from 20:00 to 22:00.
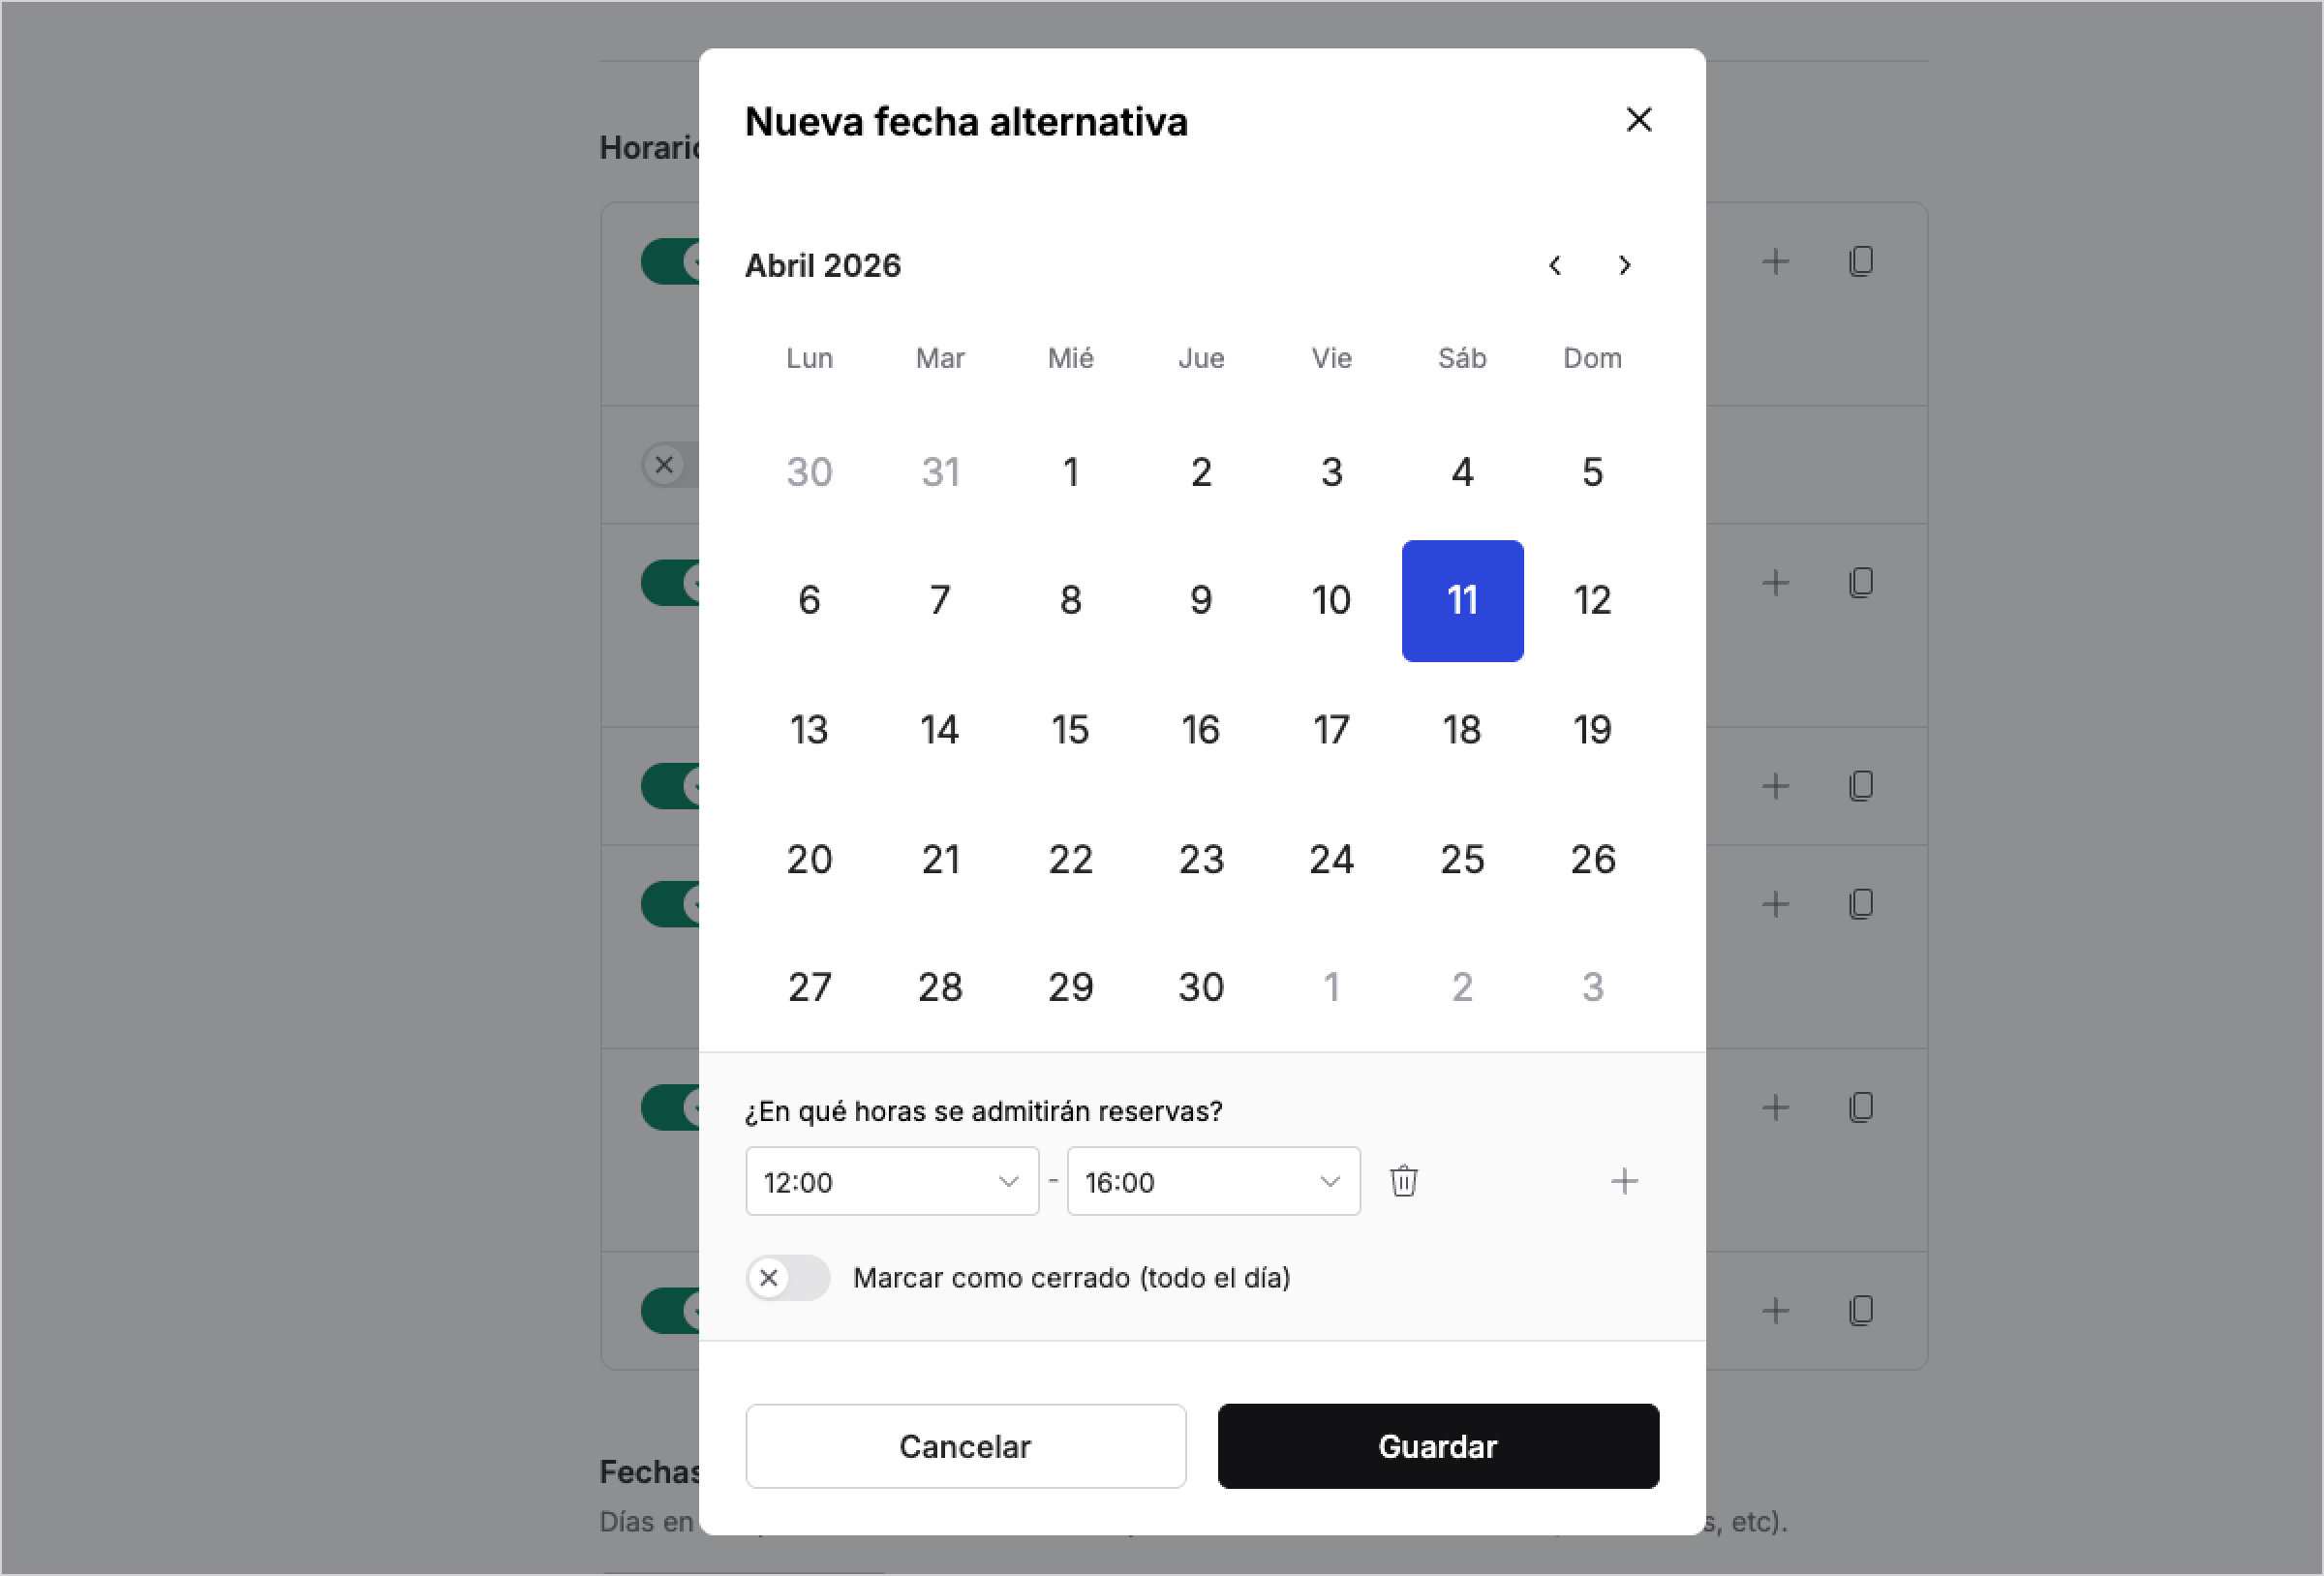
Use this feature to set special hours on specific dates. These exceptions take precedence over your regular schedule, allowing you to close for holidays or extend shifts on specific occasions.
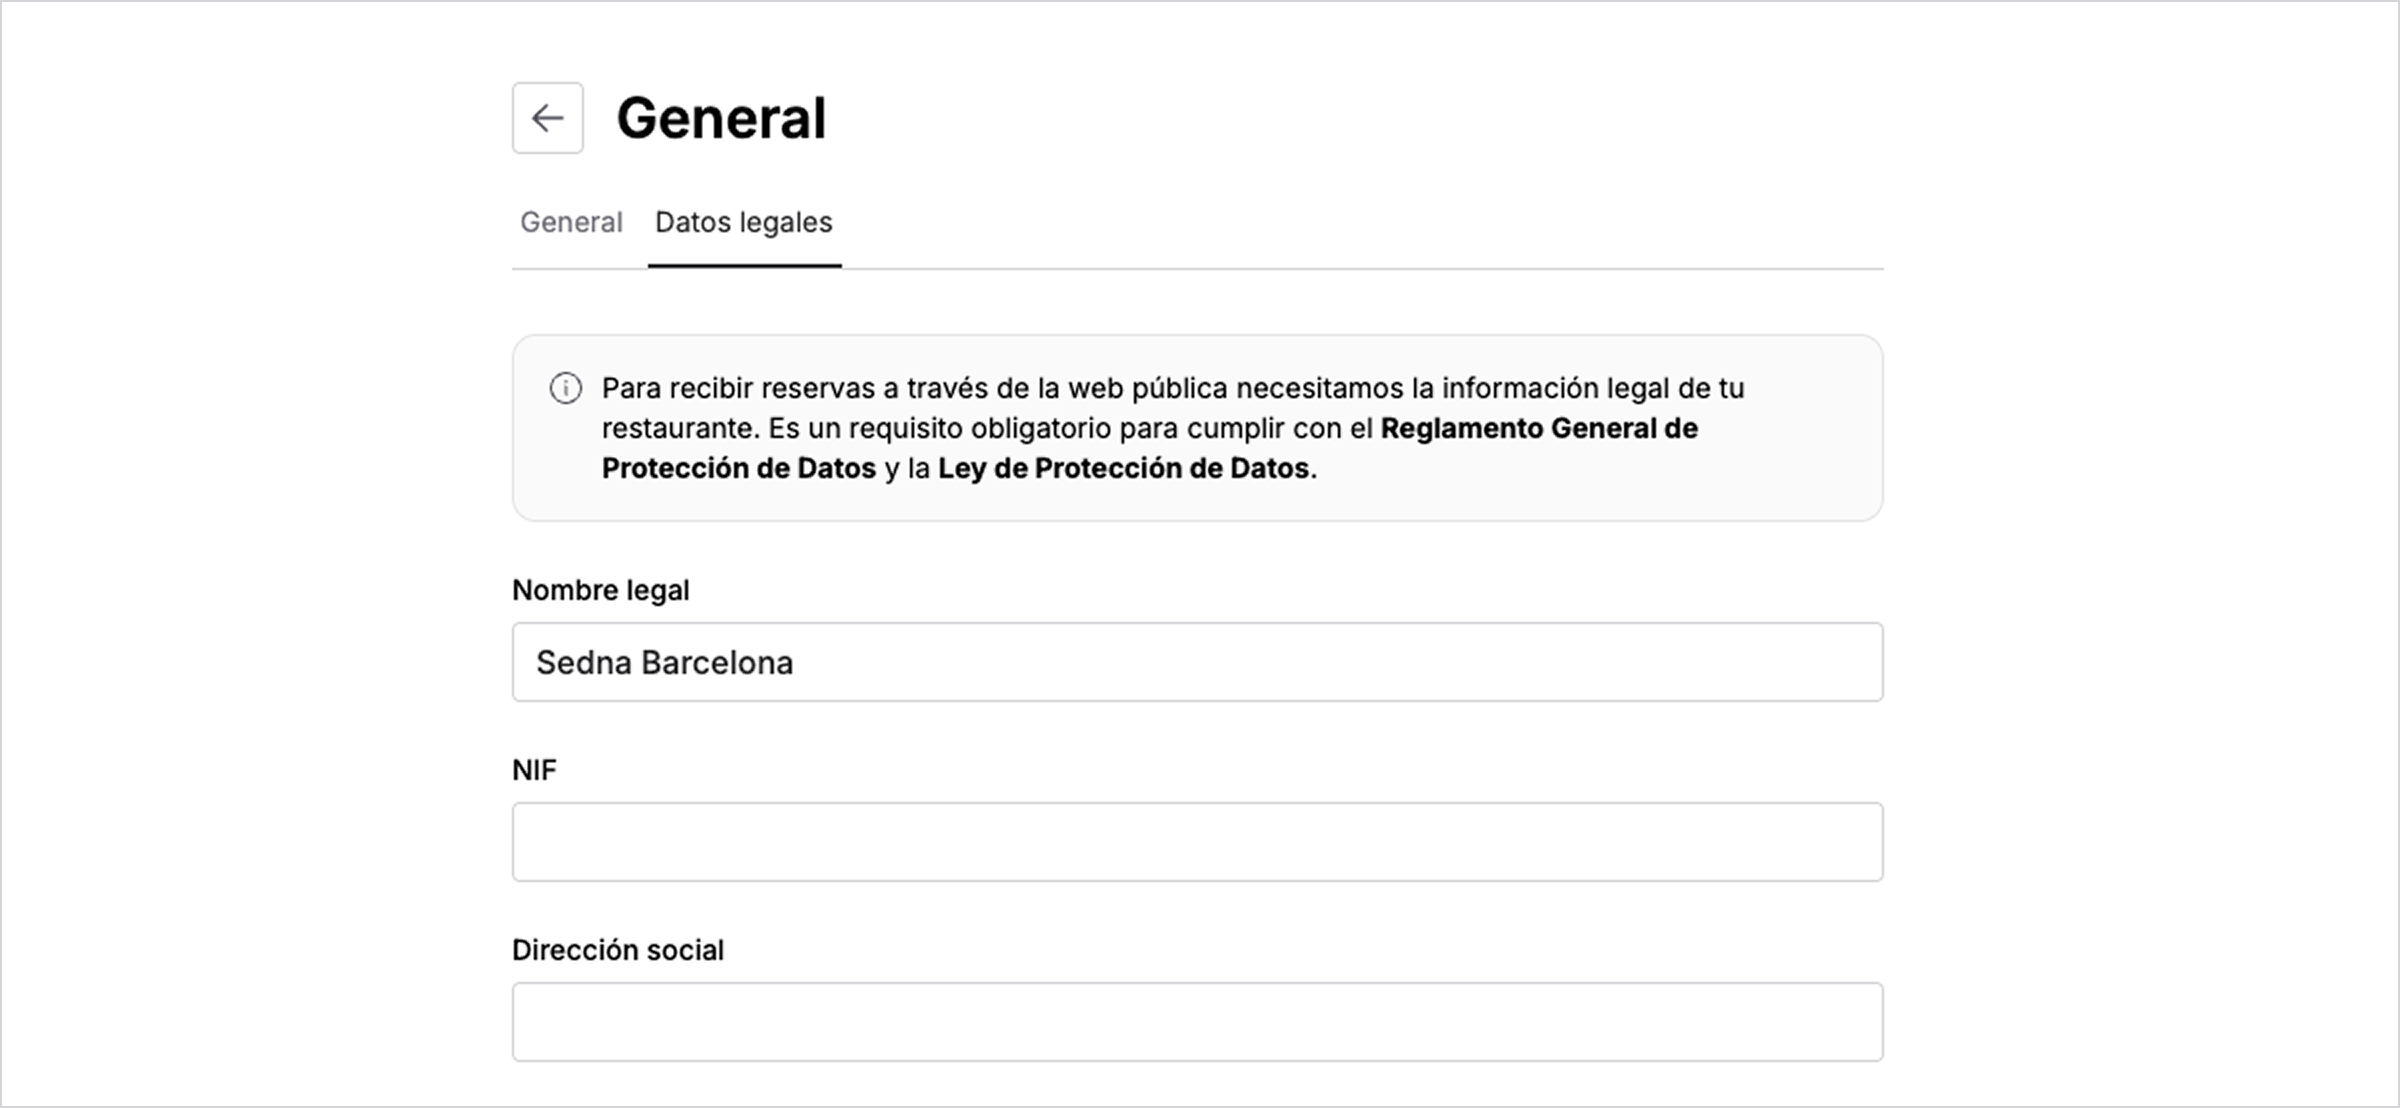
In order for your customers to make reservations through the public website, it is first necessary to complete your restaurant's legal information. This is a mandatory requirement to comply with the General Data Protection Regulation (GDPR) and the Data Protection Law.
1. Go to the Settings page.
2. Click on General and then select the Legal data tab.
3. Add the required fields: Legal name, Tax ID (NIF), Registered office address, Email, and Phone number.
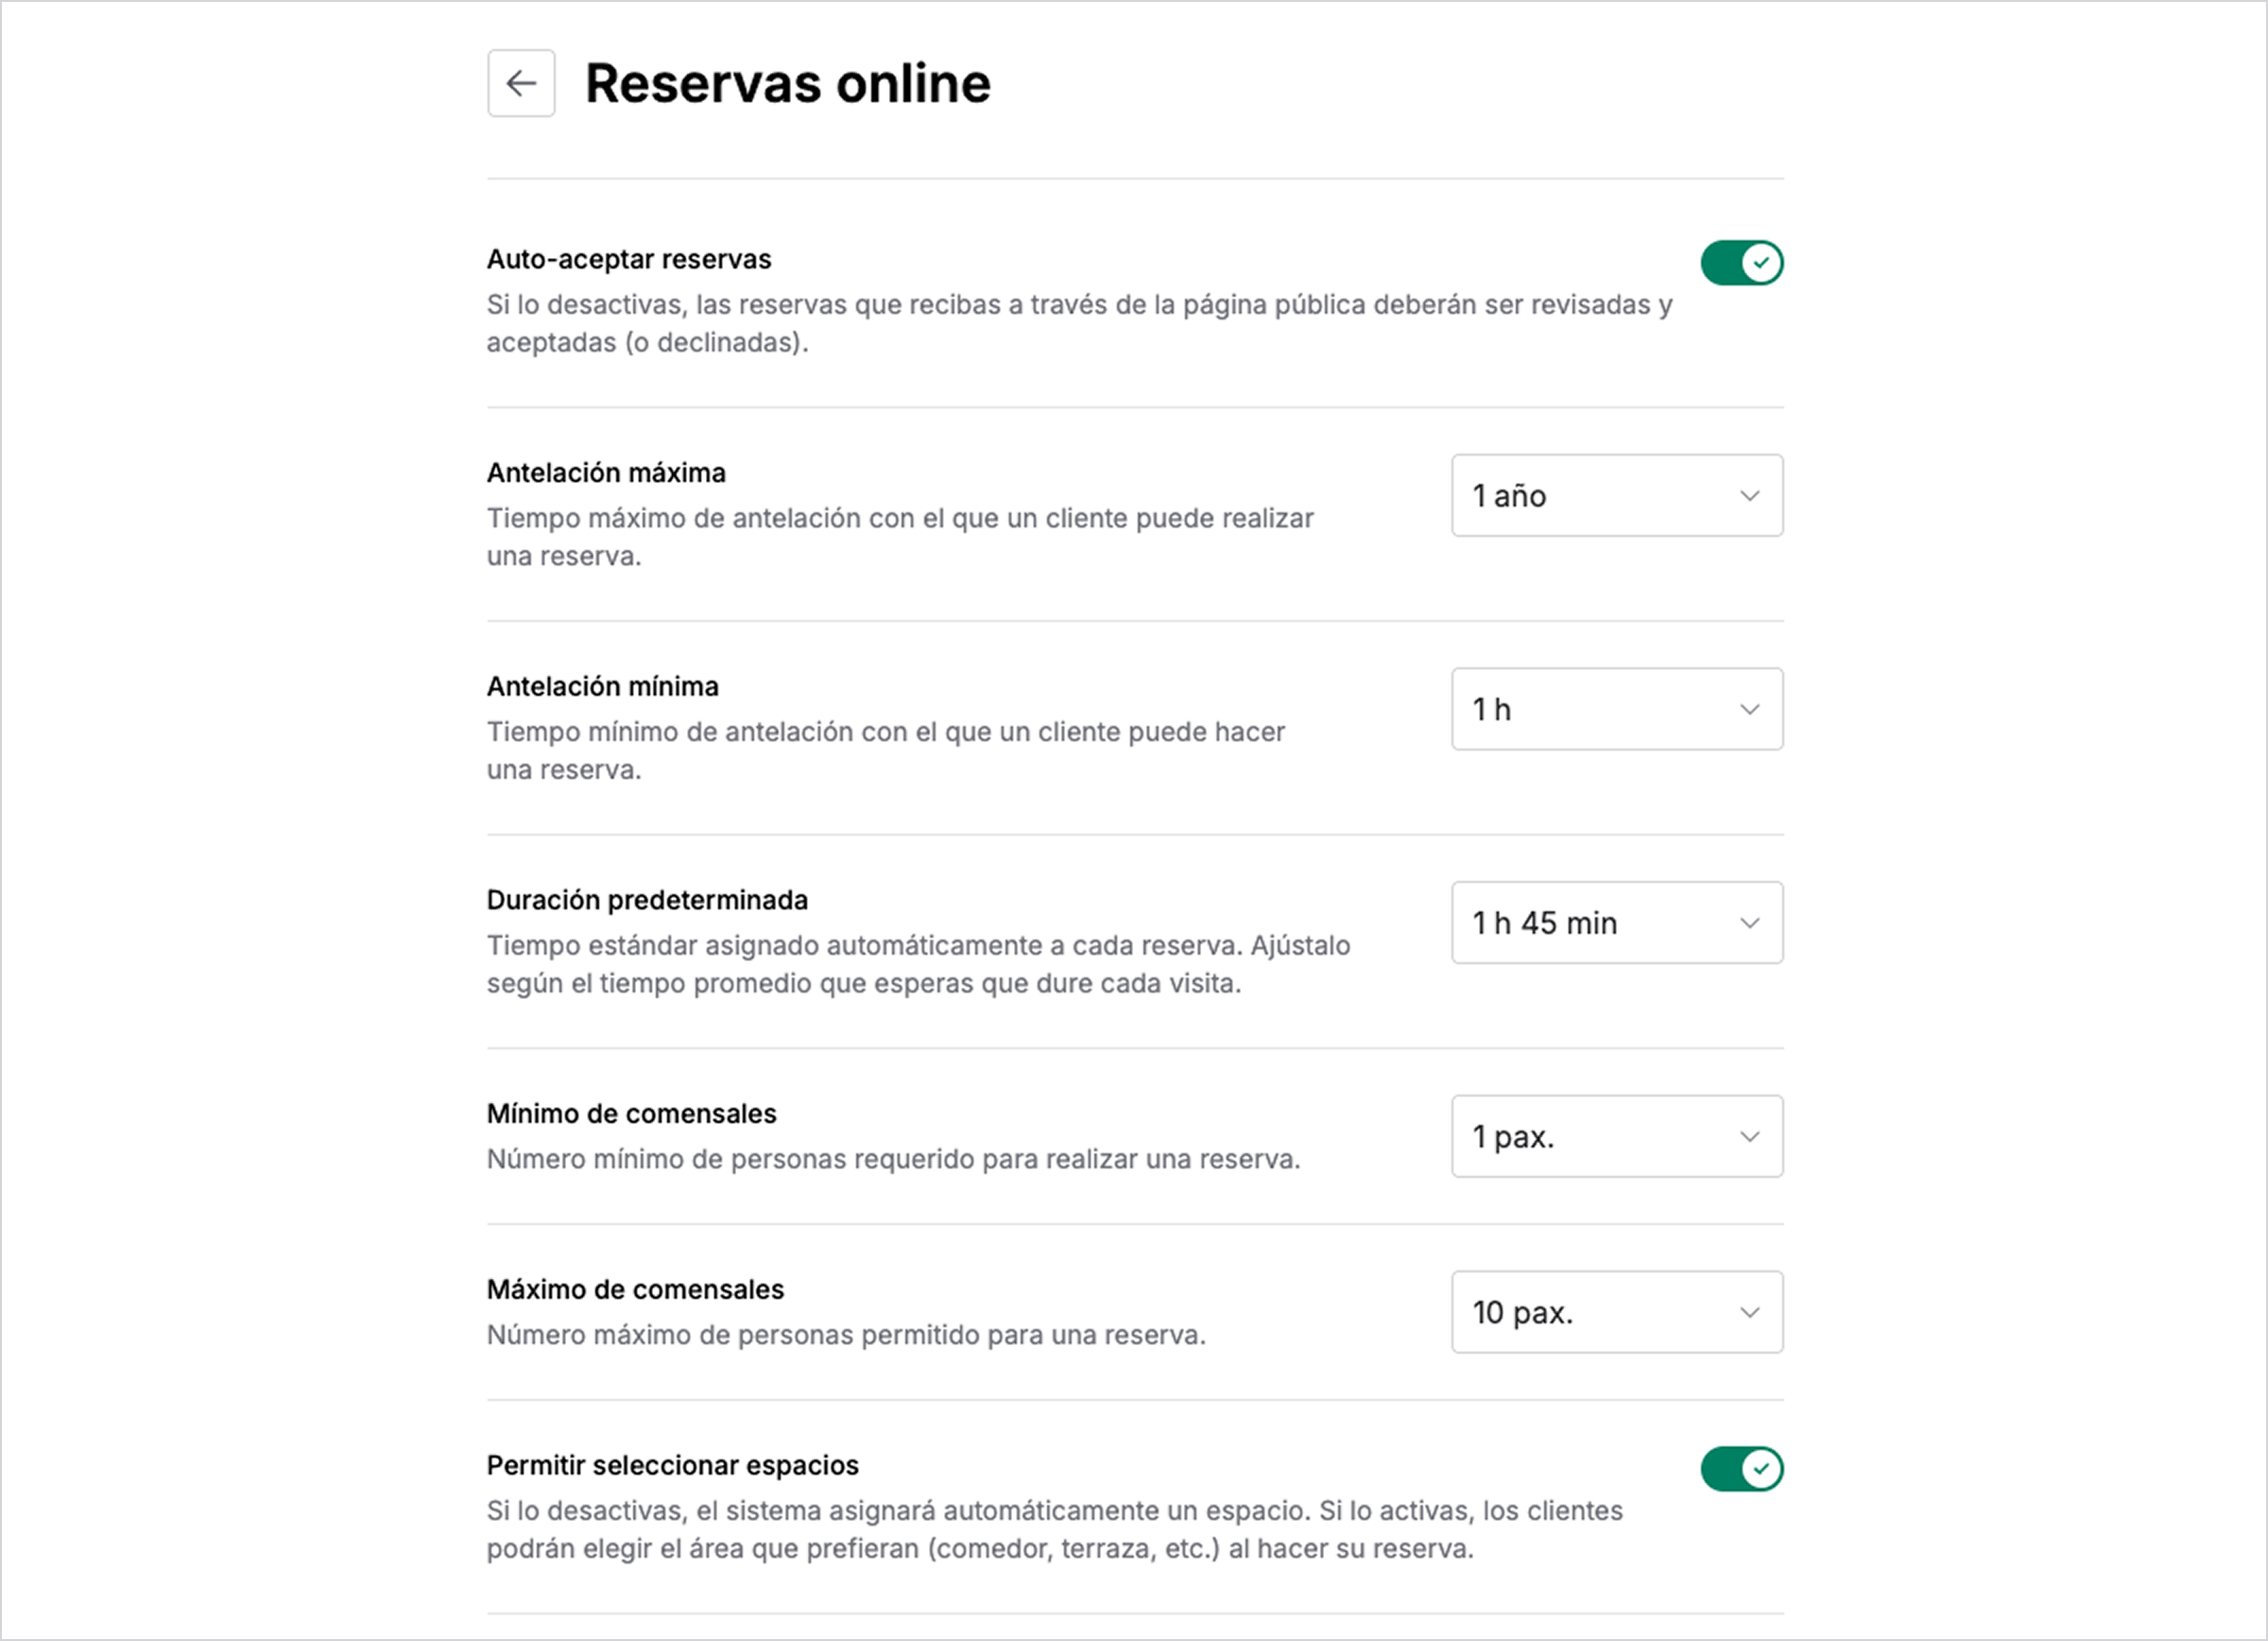
This section is the control center for your digital front desk. Here you can define the "rules of the game" for reservations coming in automatically from your public website, allowing you to automate table confirmations, set time limits, and manage capacity (minimum and maximum guests) to ensure each service is perfectly organized without manual intervention.
Automation. Enable the auto-accept feature to save time, or disable it if you prefer to manually review reservations before confirming them.
Time management. Define how far in advance (maximum and minimum) guests can book and how long each service will last to optimize table turnover.
Capacity control. Set the allowed group sizes and decide if your customers can choose specific spaces (terrace, dining room, etc.).